Getting salon-quality gel manicures at home starts with one crucial step that many people overlook: proper nail preparation. Learning how to prep nails for gel polish is the foundation of achieving long-lasting, chip-free results that rival professional salon work.
Without proper preparation, even the highest quality gel polish will lift, peel, or chip within days instead of lasting the expected 2-3 weeks.
Whether you’re a complete beginner trying gel polish for the first time or a seasoned nail enthusiast looking to perfect your technique, this comprehensive guide will walk you through every essential step of nail preparation.
From understanding why preparation matters to mastering advanced techniques, you’ll discover the secrets that separate amateur attempts from professional-looking results.
Why Proper Nail Preparation Is Essential for Gel Polish Success
The difference between a gel manicure that lasts three weeks and one that chips after three days often comes down to preparation. Unlike regular nail polish that simply sits on top of the nail, gel polish needs to form a strong chemical bond with your natural nail plate.
This bonding process requires a clean, slightly roughened surface that’s free from oils, moisture, and debris.
When nails aren’t properly prepped, several problems can occur. The gel polish may not adhere correctly, leading to premature lifting around the edges.
Air bubbles can form between the polish and nail, creating weak spots that crack easily. Most commonly, natural oils on the nail surface prevent proper bonding, causing the entire manicure to peel off in sheets.
Professional nail technicians understand that preparation accounts for roughly 70% of a successful gel manicure. The actual polish application, while important, is much easier when you’ve created the perfect foundation.
This is why investing time in proper preparation always pays off with dramatically longer-lasting results.
Essential Tools and Supplies for Nail Preparation
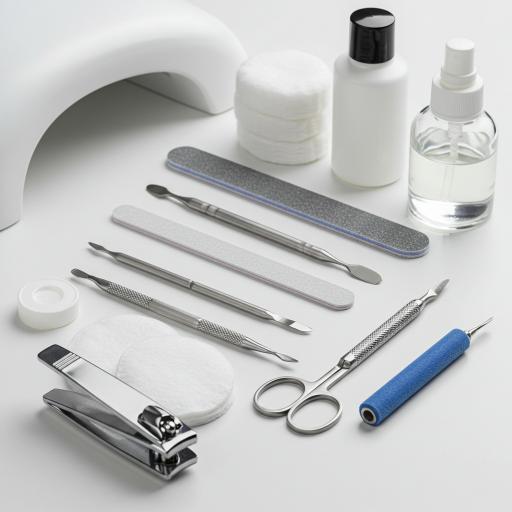
Before diving into the preparation process, gather all necessary tools and supplies. Having everything ready prevents rushing through steps or skipping important details.
Here’s what you’ll need:
Basic Preparation Tools:
- Nail clippers and nail file (180/240 grit works best)
- Cuticle pusher or orange wood stick
- Lint-free wipes or cotton pads
- 70% isopropyl alcohol or nail dehydrator
- Buffer (220 grit for gentle surface preparation)
Advanced Preparation Supplies:
- Cuticle nippers for precise trimming
- Cuticle cream for hydration before the process begins
- Nail dehydrator or primer (for problematic nails)
- Dust brush for removing filing debris
Safety Considerations: Always work in a well-ventilated area and ensure your nail clippers are properly cleaned before use to prevent bacterial contamination.
If you’re using a nail drill, familiarize yourself with proper drill bit selection to avoid damaging your natural nails.
Step 1: Removing Previous Polish and Nail Treatments
Start with completely clean nails by removing any existing polish, treatments, or enhancements. If you’re removing previous gel polish, you’ll need to follow proper removal techniques to avoid damaging your natural nails.
Getting acrylic nails off requires a different approach than standard gel polish removal.
For regular nail polish, use an acetone-based remover and lint-free pads. Work from the base of the nail toward the tip, avoiding unnecessary rubbing that can dehydrate the nail plate.
If you’re dealing with stubborn gel polish, you might need to use the foil wrap method or consider professional removal.
After removing old polish, examine your nails for any damage, staining, or irregularities. Yellow stains from previous polish should be addressed before applying new gel polish, as they can show through lighter colors and affect the final appearance.
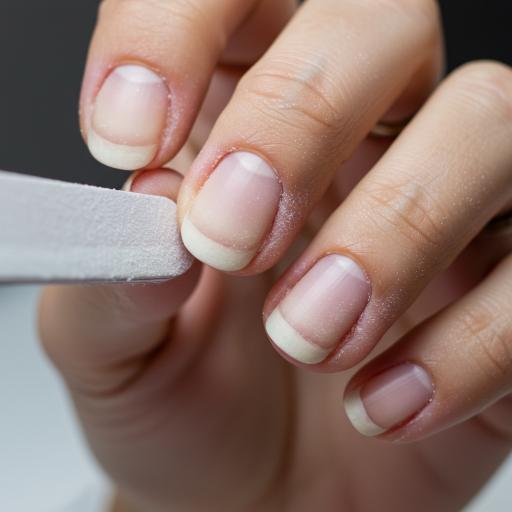
Step 2: Shaping and Filing Your Nails
Proper nail shaping creates the foundation for your gel manicure and significantly impacts how long it lasts. Choose a shape that complements your lifestyle and finger shape – shorter, rounded nails tend to be more durable for active lifestyles, while longer shapes can be stunning but require more careful maintenance.
When filing, always work in one direction rather than back and forth. This prevents creating tiny tears in the nail that can lead to breaks later.
Start with the sides of the nail, then shape the tip, and finally refine the overall contour. The goal is creating smooth, even edges without any rough spots that could catch and cause chips.
For those dealing with damaged nails, learning how to fix a broken nail at home can help salvage your manicure and prevent having to start over.
Minor breaks can often be repaired with proper techniques and don’t necessarily require professional intervention.
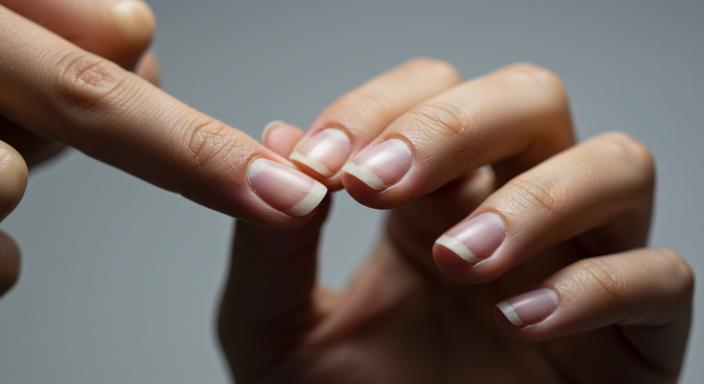
Step 3: Cuticle Care and Preparation
Healthy cuticles are essential for a professional-looking manicure, but they require careful attention during preparation. Begin by applying cuticle cream or a few drops of jojoba oil for cuticle care to soften the skin.
This makes removal easier and less traumatic for the delicate skin around your nails.
Wait 2-3 minutes for the softening product to work, then gently push back the cuticles using a cuticle pusher or orange wood stick. Work slowly and avoid applying excessive pressure, which can damage the nail bed or cause bleeding.
The goal is revealing more of the nail plate for polish application while maintaining healthy cuticle tissue.
Understanding how to treat cuticles properly involves knowing when to trim and when to simply push back. Only trim loose, hanging pieces of skin – never cut into living tissue.
If you’re uncomfortable with cuticle trimming, pushing back alone can provide excellent results.
Step 4: Surface Preparation and Dehydration
The nail surface must be properly prepared to ensure optimal gel polish adhesion. Start by gently buffing the nail surface with a fine-grit buffer (220 grit or higher).
The goal isn’t to thin the nail or create deep scratches, but rather to remove the natural shine and create a slightly textured surface that gel polish can grip.
Focus on removing any remaining oils, moisturizers, or debris from the nail surface. Even microscopic amounts of oil can prevent proper bonding and lead to premature lifting.
Pay special attention to the area around the cuticle and the tip of the nail, where lifting most commonly occurs.
After buffing, remove all dust and debris with a clean, dry brush or lint-free wipe. Any particles left on the nail can create bumps or weak spots in your final manicure.
This is also an excellent time to address any nail wellness concerns you might have noticed during preparation.
Step 5: Dehydrating and Priming the Nail
The final preparation step involves thoroughly dehydrating the nail surface to remove all traces of moisture and oil. Use 70% isopropyl alcohol or a professional nail dehydrator, applying it with a lint-free wipe or brush.
Work systematically across each nail, ensuring complete coverage from cuticle to tip.
Allow the dehydrator to evaporate completely before proceeding – this usually takes 30-60 seconds per nail. Some professionals prefer using a nail primer after dehydration, especially for clients with oily nail beds or those prone to lifting.
Primer creates an additional bonding layer that can significantly improve gel polish longevity.
For nails that consistently have adhesion problems, consider whether builder gel might strengthen your nails and provide a better base for color application.
Some nail types benefit from a thin layer of clear builder gel before color application.
Common Preparation Mistakes to Avoid
Even experienced nail enthusiasts can fall into preparation traps that sabotage their results. One of the most common mistakes is rushing through the dehydration process.
Natural nail oils can resurface quickly, so if you get distracted between preparation and polish application, you may need to repeat the dehydration step.
Over-buffing is another frequent error that can thin the nails and cause long-term damage. The goal is light surface texturing, not aggressive removal of nail tissue.
If you can see dramatic color changes in your nail after buffing, you’ve likely gone too far.
Contamination during preparation can also ruin your results. Avoid touching prepared nails with your fingers, and keep all tools clean throughout the process.
Even small amounts of hand lotion or natural skin oils can transfer to the nail surface and interfere with adhesion.
Advanced Preparation Techniques for Problem Nails
Some nail types require specialized preparation techniques to achieve optimal results. Very oily nails may benefit from multiple dehydration steps or the use of professional-grade primers.
Nails with ridges or irregularities might need careful buffing or even a ridge-filling base coat.
For clients with thin or flexible nails, gentle preparation is crucial to avoid further weakening. Consider using strengthening treatments between gel manicures to maintain nail health.
These nails often benefit from shorter lengths and rounder shapes that reduce stress points.
Nails with previous damage or staining may require additional preparation time. Sometimes multiple preparation sessions are needed to fully address issues before achieving perfect gel polish results.
Patience during this process always pays off with superior final results.
Understanding Different Nail Types and Preparation Adjustments
Not all nails are created equal, and successful preparation requires adjusting your technique based on individual nail characteristics. Dry, brittle nails need gentler handling and may benefit from hydrating treatments before beginning preparation.
However, any hydrating products must be completely removed before gel application.
Soft, flexible nails require minimal buffing but thorough dehydration. These nails often have naturally higher moisture content that can interfere with gel adhesion.
Extra attention to the dehydration step and potentially using a bonding primer can make a significant difference.
Very hard nails might need slightly more aggressive surface preparation to create adequate texture for bonding. However, always err on the side of caution – you can always do a bit more preparation, but you can’t undo over-buffing.
Timing and Workflow Optimization
Efficient preparation requires good timing and workflow management. Plan for 15-20 minutes of preparation time for a full set of nails, longer if you’re new to the process.
Working systematically through each step on all nails before moving to the next step helps ensure consistency and prevents mistakes.
Some steps can be optimized by working on multiple nails simultaneously. For example, you can apply cuticle softener to all nails at once, then work through pushing back cuticles systematically.
However, the final dehydration step should be done just before polish application to prevent recontamination.
Consider your overall manicure timeline when planning preparation. If you’re planning an elaborate nail art design, more thorough preparation becomes even more critical since you’ll be investing significant time in the overall process.
Seasonal and Environmental Considerations
Environmental factors can significantly impact nail preparation requirements. During humid weather, nails may require extra dehydration time and possibly multiple alcohol applications.
Winter heating can make nails more brittle, requiring gentler handling during preparation.
Your living environment also matters. Homes with hard water may leave mineral deposits on nails that interfere with gel adhesion.
Air conditioning can cause rapid moisture changes that affect how nails respond to preparation products.
Consider these factors when planning your manicure timing and adjust your preparation routine accordingly. What works perfectly in January might need modification in July due to environmental changes.
Troubleshooting Common Preparation Issues
When preparation doesn’t go as planned, knowing how to troubleshoot can save your manicure. If you accidentally over-buffer a nail, stop immediately and allow it to recover for a few days before attempting gel application.
Thin spots in nails are more prone to damage and poor gel adhesion.
If cuticles become irritated during preparation, apply a small amount of cuticle oil and allow healing before proceeding. Working on irritated skin can lead to infection and will definitely affect your manicure results.
For nails that consistently have adhesion problems despite proper preparation, consider consulting a professional nail technician. Sometimes underlying nail health issues require professional assessment and treatment.
Maintaining Nail Health Between Gel Manicures
Proper preparation isn’t just about the current manicure – it’s also about maintaining nail health for future gel applications. Between gel manicures, focus on nail care routines that keep nails strong and healthy.
Regular moisturizing of cuticles and nail beds helps prevent hangnails and keeps the nail area looking polished between manicures. However, always remove all moisturizing products thoroughly during your next preparation session.
Consider taking breaks between gel manicures to allow nails to recover and strengthen. During these breaks, focus on treating your nails with strengthening treatments and gentle care.
Understanding UV Lamp Requirements for Gel Polish
Once your nails are perfectly prepped, you’ll need proper curing equipment to achieve professional results. Understanding the best UV nail curing lamps is crucial for proper gel polish application.
Avoiding common UV lamp mistakes during the curing process ensures your preparation work isn’t wasted due to improper polymerization.
Gel Polish Application Tips After Preparation
With perfectly prepped nails, your gel polish application becomes much easier and more successful. Understanding why gel nails become sticky can help you troubleshoot any issues that arise during application.
Following proper gel manicure tips ensures your preparation work translates into beautiful, long-lasting results. Proper preparation is the foundation, but correct application technique seals the deal.
Comparing Gel Polish to Other Nail Enhancement Options
Understanding the differences between gel vs dip nails can help you choose the best option for your lifestyle and nail type. Each system has different preparation requirements, so knowing what works best for your nails is essential.
For those interested in exploring alternatives, learning about what acrylic nail extensions are provides insight into other enhancement options that require different preparation techniques.
Making Your Manicure Last Longer
Beyond preparation, several factors influence how long your gel manicure will last. Understanding why gel nail polish might peel off helps you identify and correct issues before they ruin your manicure.
If you prefer press-on nails occasionally, knowing how to make press-on nails last provides an alternative when you want to give your natural nails a break from gel polish.
Professional vs. At-Home Preparation
While this guide focuses on at-home preparation, understanding professional techniques can elevate your results. Professional nail technicians often use specialized dehydrators and primers that aren’t readily available to consumers.
They also have professional-grade tools that make certain steps easier and more precise. However, with proper technique and quality tools, home preparation can achieve professional-level results.
The key is taking your time, following proper steps, and not rushing through any part of the process. Consistency and attention to detail separate good home manicures from great ones.
Addressing Common Health Concerns
Some people worry about potential health effects of gel polish systems. Understanding whether UV lamps for nails pose any risks helps you make informed decisions about your nail care routine.
There are also questions about whether nail varnish damages nails with regular use. Proper preparation and removal techniques significantly reduce any potential for damage.
For those with specific health concerns, consulting with a dermatologist or nail professional can provide personalized guidance based on your individual situation.
Seasonal Nail Care and Preparation Adjustments
Different seasons require slight adjustments to your preparation routine. Winter air tends to be drier, which can make nails more brittle and require gentler buffing techniques.
Summer humidity might necessitate extra dehydration steps to ensure proper gel adhesion. Understanding these seasonal variations helps you adapt your technique for consistently excellent results year-round.
Consider incorporating seasonal nail designs like March nail designs or light purple nail designs to keep your manicures fresh and current with trends.
Building Your Nail Care Kit
For beginners, starting with a comprehensive kit can make the preparation process much easier. Research the best gel nail starter kits to ensure you have all necessary tools and supplies.
Quality tools make a significant difference in both the ease of preparation and the final results. Investing in good buffers, files, and cuticle tools pays off with better manicures and longer-lasting results.
Conclusion: Setting Yourself Up for Gel Polish Success
Mastering how to prep nails for gel polish is an investment that pays dividends in every future manicure. While the process might seem lengthy initially, proper preparation becomes second nature with practice and consistently delivers professional-quality results that last for weeks rather than days.
Remember that preparation is not just a preliminary step – it’s the foundation upon which your entire gel manicure success depends. Taking the time to properly clean, shape, and prepare your nails creates the perfect canvas for beautiful, long-lasting gel polish that rivals salon results.
The techniques outlined in this guide work for both beginners learning their first gel application and experienced nail enthusiasts looking to perfect their skills. With proper preparation, you’ll find that gel polish applies more smoothly, looks more professional, and lasts significantly longer than when preparation steps are rushed or skipped entirely.
Consistency in your preparation routine will lead to consistently beautiful results. Each step builds upon the previous one, creating the optimal conditions for gel polish to perform at its best.
Remember to be patient with yourself as you learn these techniques – even professional nail technicians took time to perfect their preparation skills.